

PART I
Recently I had to swap one of my work days (a Tuesday for a Wednesday) and it just so happened that there was a class on at my 'Local' on the Tuesday that I was really interested in doing. Tania was going to show us how to make "folded" cranes. I was given a handout when I signed up and had a little look for some fabrics to add to the ones I knew I had in my stash. I should note, at this time, that I had grand ideas for a nice size quilt.

PART II
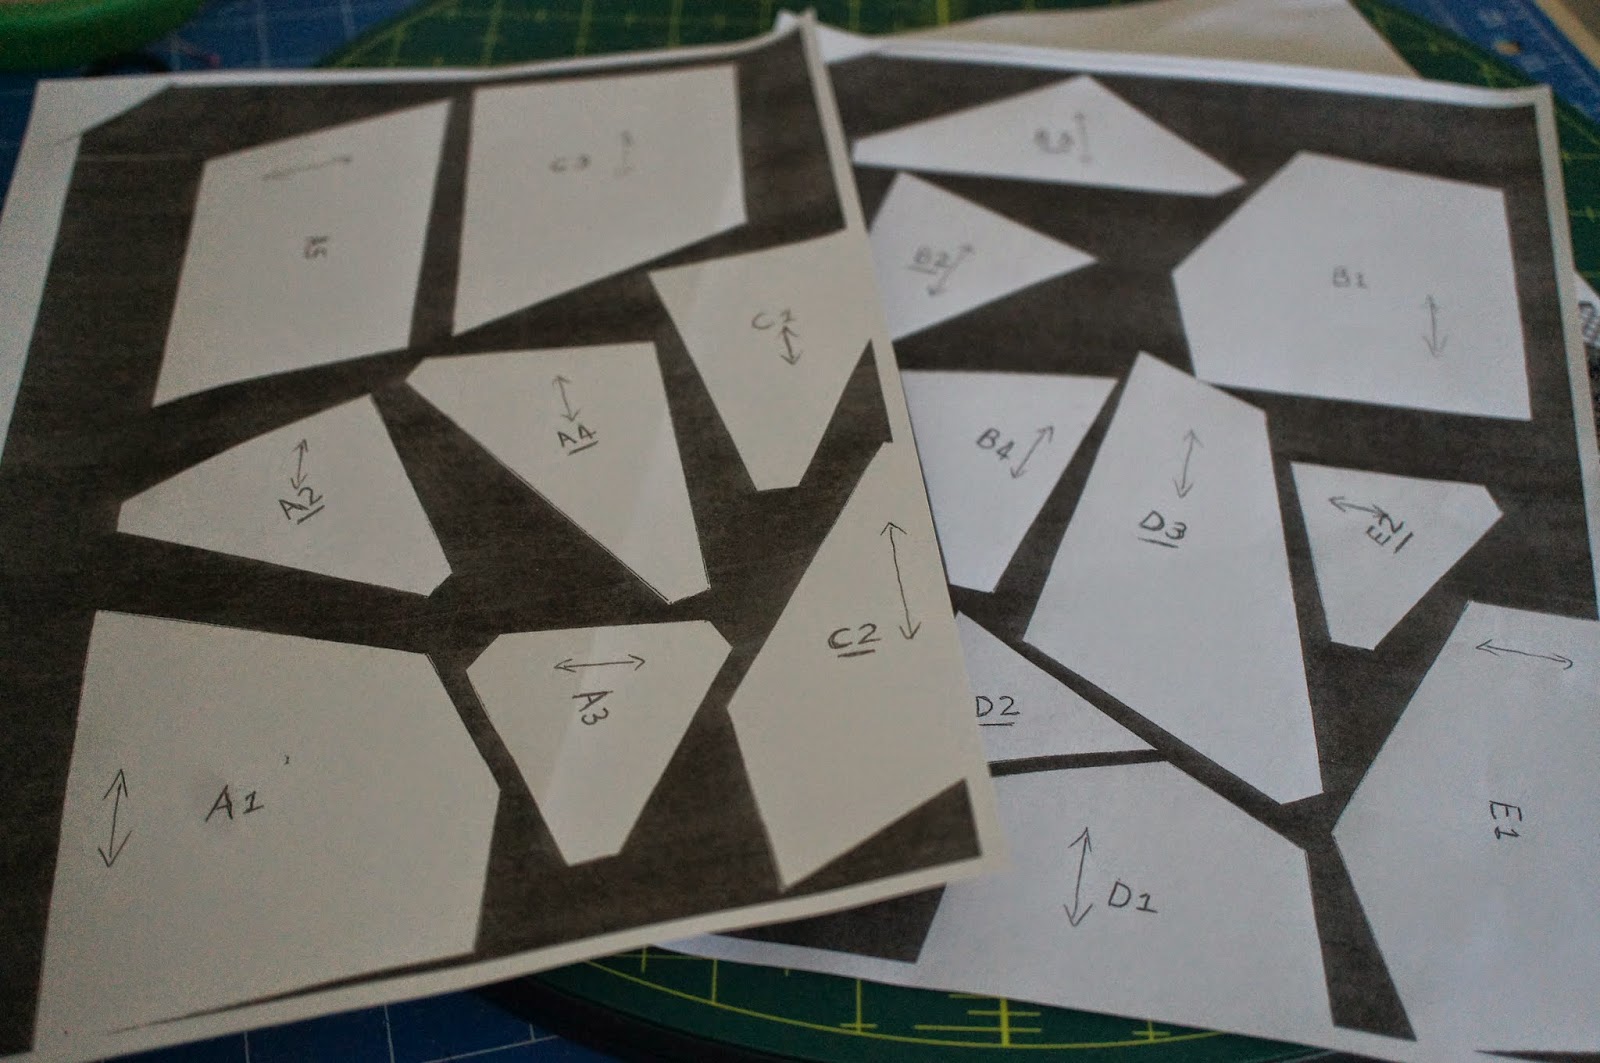
So armed with my trusty Pfaff and my fabrics and supplies including the templastic templates I joined 5 other ladies for a morning of sewing. Even though I knew all the ladies I was spending the day with, I was especially glad to have my dear friend, Zita, there as well. Tania gave us verbal instructions on what we had to do with the cut out shapes. They all have letters and numbers and the underlined ones where to be the parts of the crane and those not underlined were for the background.
The other ladies were pinning their shapes to the fabric which created a bump and they had difficulty cutting them out. Because mine were on templastic, they stayed in place when I placed my ruler on the edge while I used my rotary blade and I was glad I thought of that. I perfected this technique when I got home by putting a dab of stick glue on the shape and sticking it to the fabric and also using my swivel cutting board.


PART III
I spent a couple of days just looking at these three cranes and trying to decide what to do with them. A table runner or a wall hanging? The original sample in the shop that got me interested in these cranes was a wall hanging so I decided to go with that. At this stage, I decided not to go with those fabrics that I had bought at the beginning of this project but attack my stash for something else. I think these will do nicely.

Because of those wonky edges I had to trim my square down quite close to the wing tips of the cranes and when I added a border, I was sorry to lose those lovely sharp points but there was nothing I could do about it.

I added the outer border and decided to go with a triangular piece at the bottom with the scope to add a tassel. I had a lovely gold one from a present, two or three Christmases ago. Firstly I had to quilt my piece. The piece is too little to load onto the big quilter, Ava, so I tackled it on my Janome. I went with bubbles for filling in around the cranes. I enjoy doing this much more than stippling.


I hope you enjoyed reading about my Folded Cranes. I will be linking in to Barbara's NewFO Challenge over at Cat Patches. You would be more than welcome to visit and see the other NewFO's for April

ps......I have since resigned from my job which means I have all the time in the world to dedicate to my Creation Station and countless NewFO's......unless I am lunching with friends!

I love the wall hanging. The quilting is great for the background, the colors wonderful, and the tassel a great finish.
ReplyDeleteLovely Cath. Enjoy your new found time off.
ReplyDeleteYour wall hanging looks fabulous Cath. Have fun being a lady of leisure!
ReplyDeletePretty! Enjoy your stitching
ReplyDeleteSuch a beautiful finish, love the colours!
ReplyDeleteBeautiful crane wall hanging wonderful finish.
ReplyDeleteI just love the colors you have chosen and you have done a beautiful job with the cranes !
ReplyDeleteCongratulations on your new found time. Hope you enjoy it.
Rose
I like the colours you have chosen for your cranes. The wall hanging looks lovely
ReplyDeleteawesome!
ReplyDeleteYour wall hanging is beautiful Cath!
ReplyDeleteWow! That really turned out beautifully.
ReplyDeleteI love it Cath and the end result is beautiful... the bubbles quilting really gives the cranes a lift...
ReplyDeleteHugz
Lovely cranes Cath and congrats on retirement :-)
ReplyDeleteThe Wall hanging is just lovely!
ReplyDeletewhat a great class to have attended, looks rather complicated to me though. Love how you have used these in a wall hanging and you choice of fabrics has worked so very well
ReplyDeleteYour wall-hanging is beautiful! Happy retirement!
ReplyDeleteThis is wonderful. Congratulations! When I was living in Hawaii, some student teachers came in and taught us to make origami cranes and also origami balls. Even at this ripe old age, I can still remember how to do it. Very sweet wall hanging.
ReplyDeleteOooh! The cranes are lovely!! I do know what you mean about beginning to make a large quilt & realizing it would be a bit too much - I have a nice Storm at Sea block that I made as a trial for a wedding quilt gift, still sitting on my stack 5 years later! lol (They did get a quilt for a gift though)
ReplyDeleteGot to laugh about this - I bought the pattern for foundation pieced cranes - yes was going to make a zillion 'cause they are quite small - (well maybe 16 or 25 or so)...made one - that cured me I think!!!
ReplyDeleteYours look lovely..
Think of all that sewing you will be doing now . . . .(bit green eyed here)
how beautiful. Your cranes' wall hanging looks gorgeous.
ReplyDeleteI had a pattern for paper pieced cranes that sat for years in case i miraculously would know how to make them, gave up and rehoused it.